Every download from the terminal is a native import file for your platform —
the same levels you see on the web, drawn on the chart you actually trade. One file per
instrument per session. Here's the exact path for each platform.
01 — PlatformNinjaTrader 8
Auto-sync indicator
Auto-sync — install once, never download a file
a free indicator pulls your levels straight from spectre.markets every session — no files, no folders
NinjaTrader has no native way to import horizontal lines from a file, so we provide a free
indicator, SPECTRE_Levels. You set it up once with your personal key — after that it
fetches the fresh levels from our server itself every session and redraws. Your download-wizard
choices (which groups, colours, custom labels, held %) come through automatically.
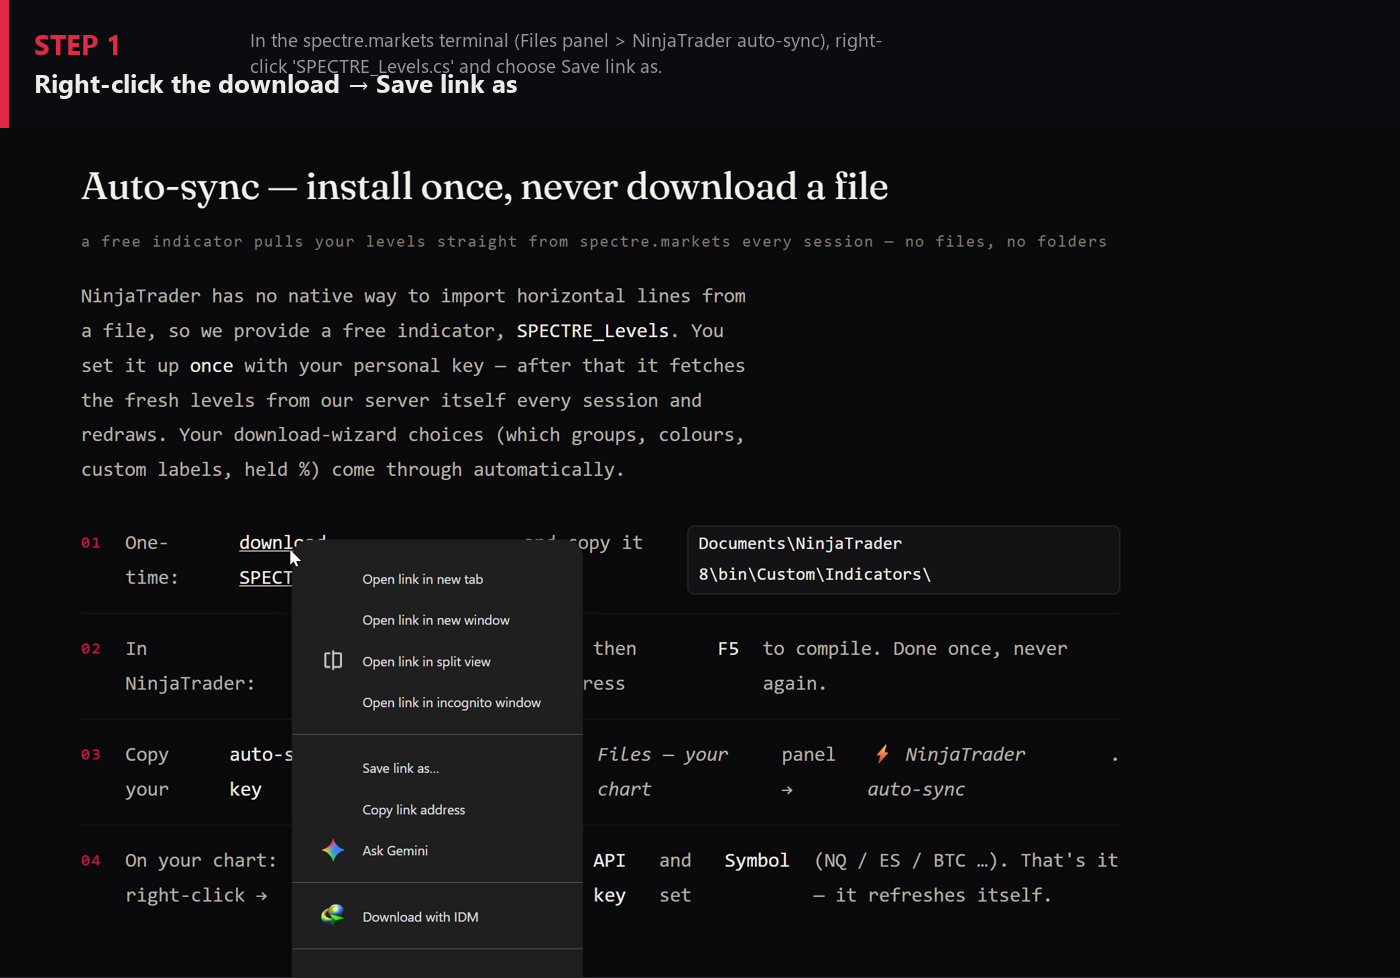
In the terminal's Files — your chart panel, right-click SPECTRE_Levels.cs → Save link as…
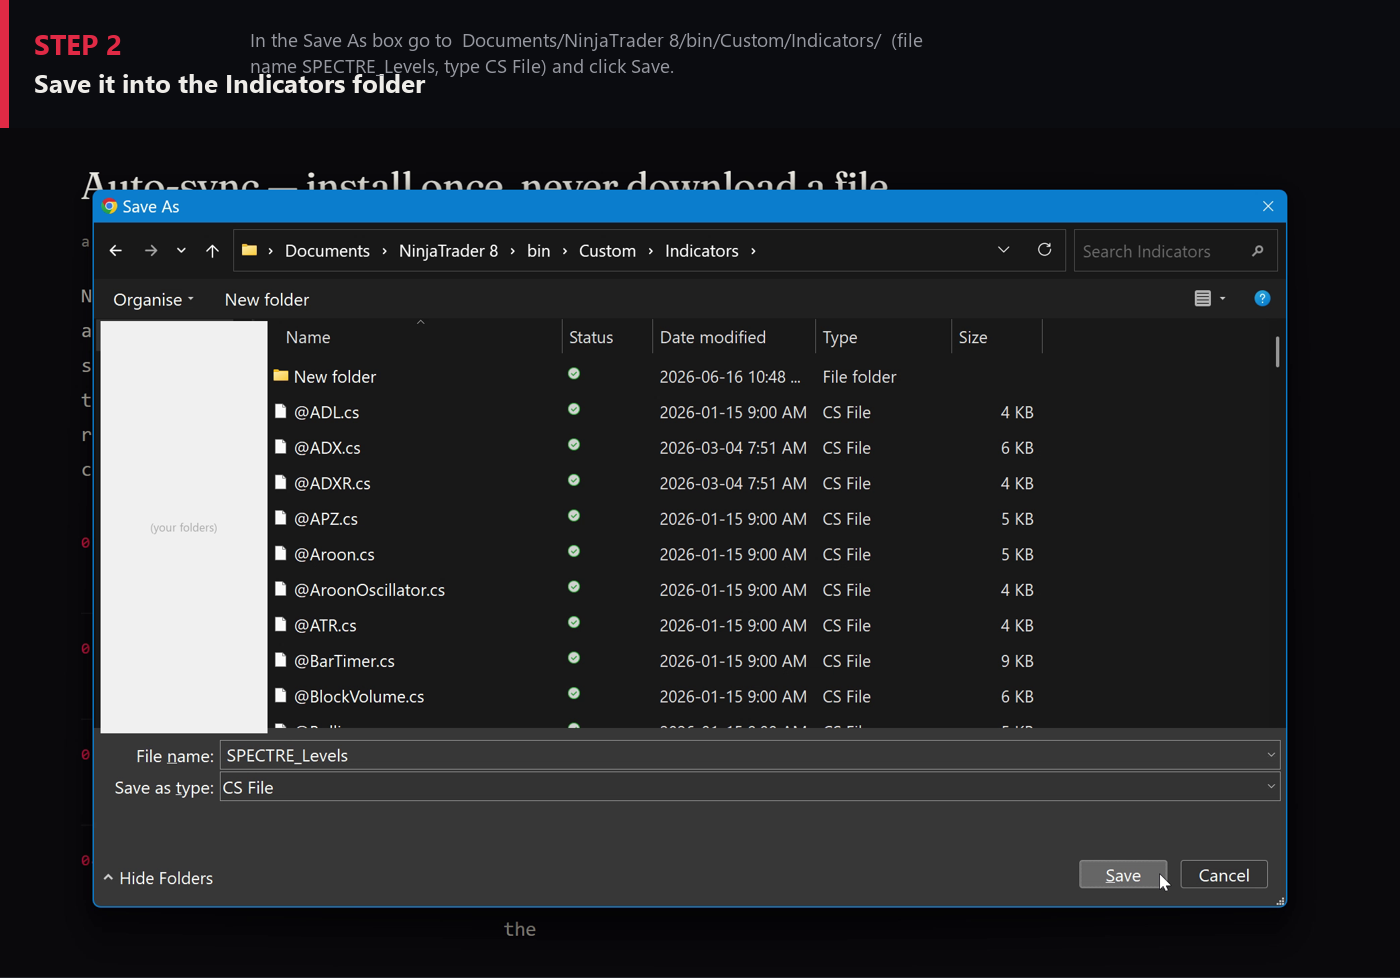
Save it into Documents\NinjaTrader 8\bin\Custom\Indicators\ as a CS File.
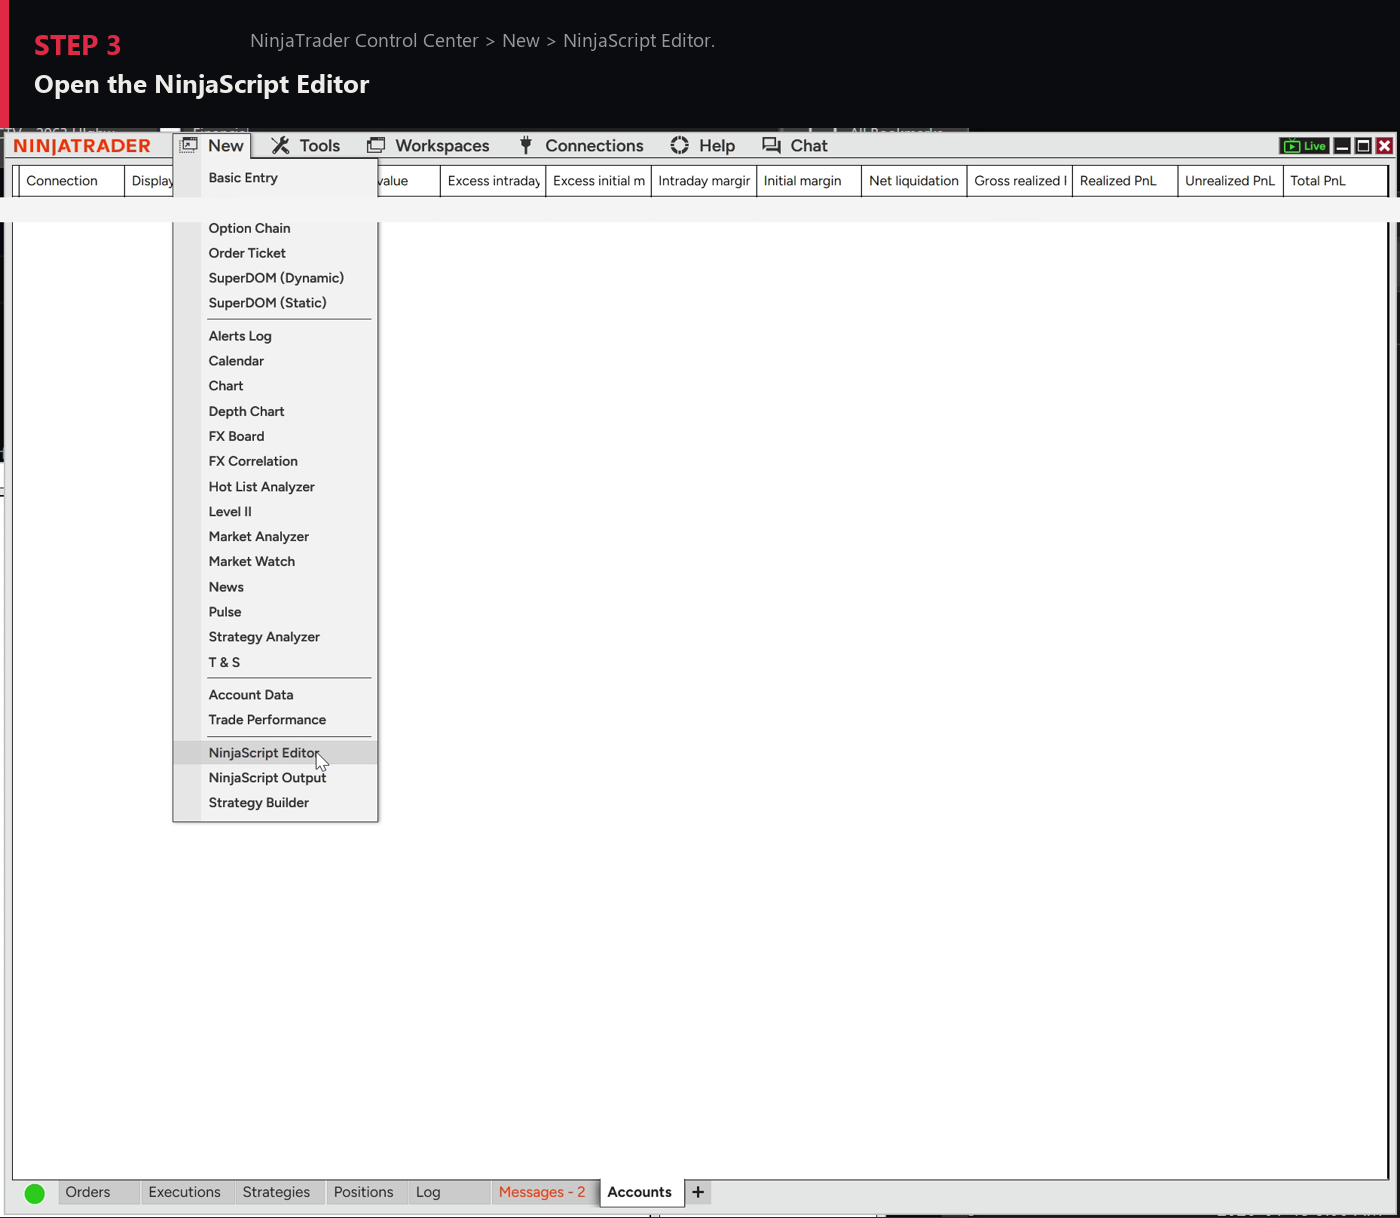
In NinjaTrader: Control Center → New → NinjaScript Editor.
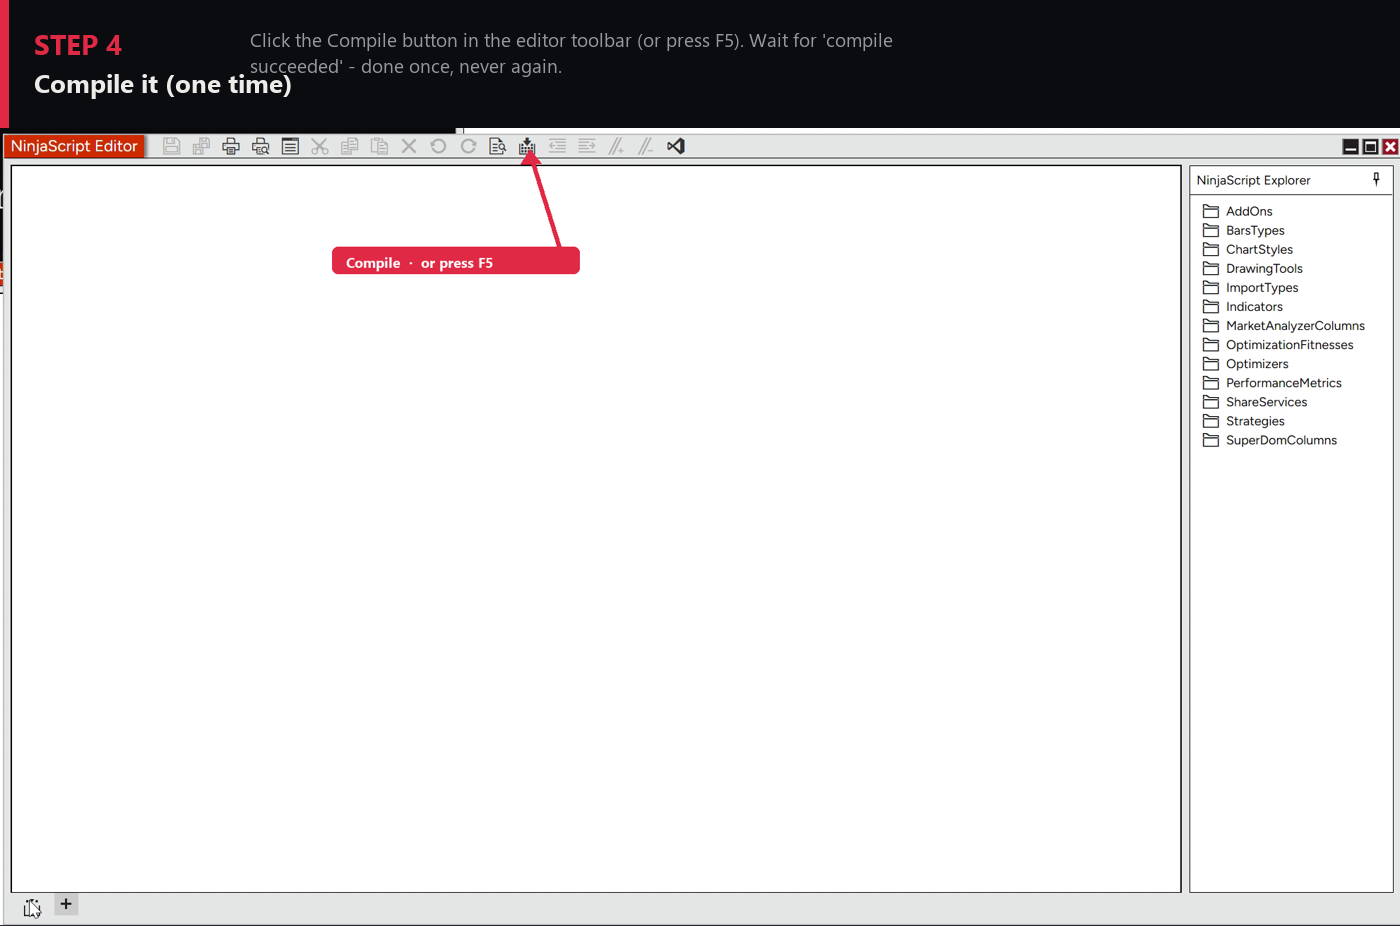
Press the Compile button (or F5). One time only — never again.
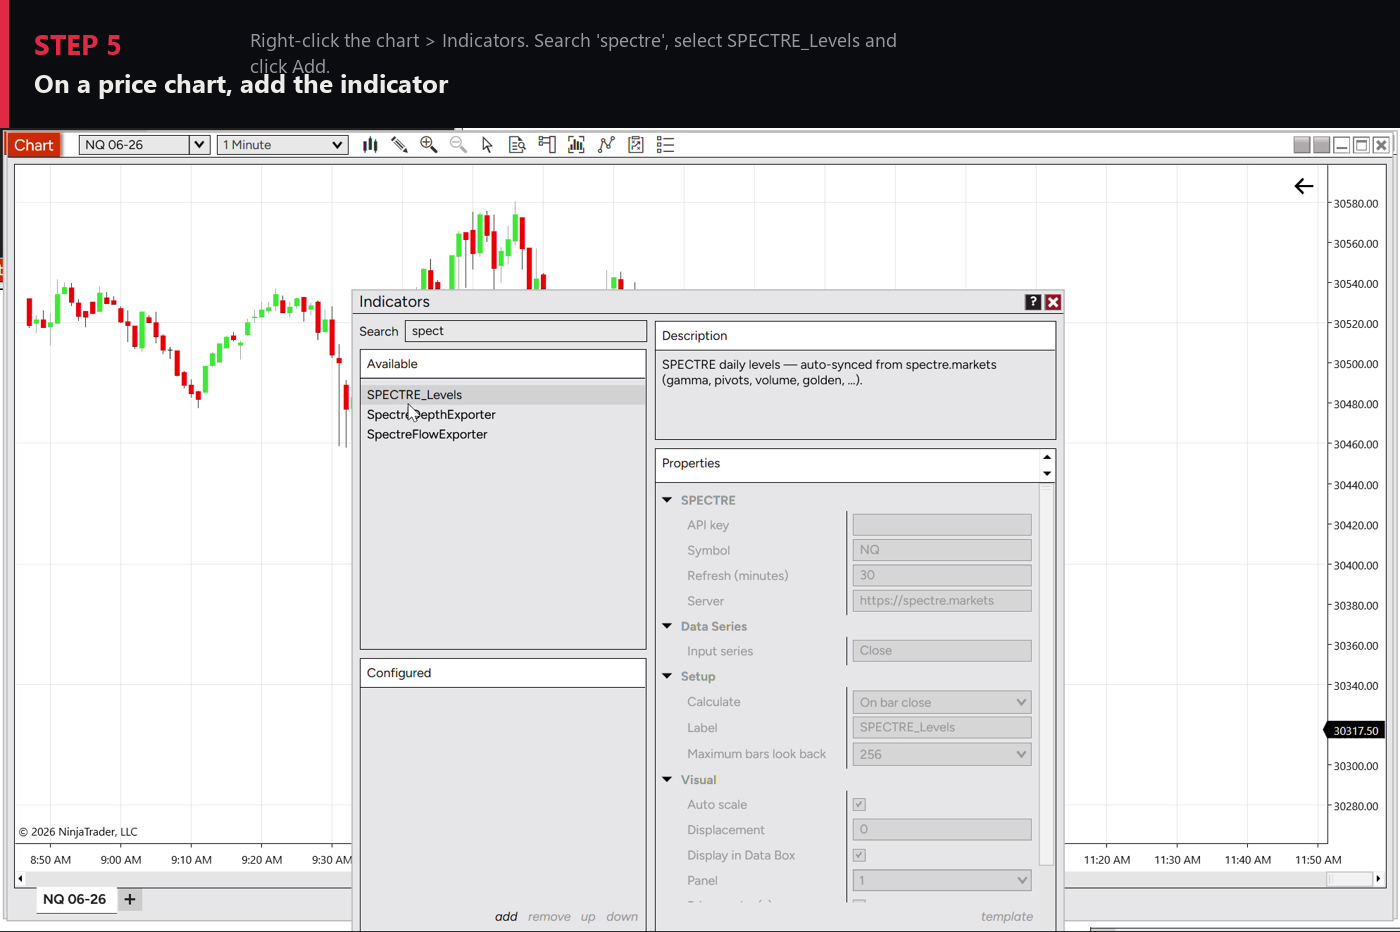
On a price chart: right-click → Indicators, search "spectre", select SPECTRE_Levels → Add.
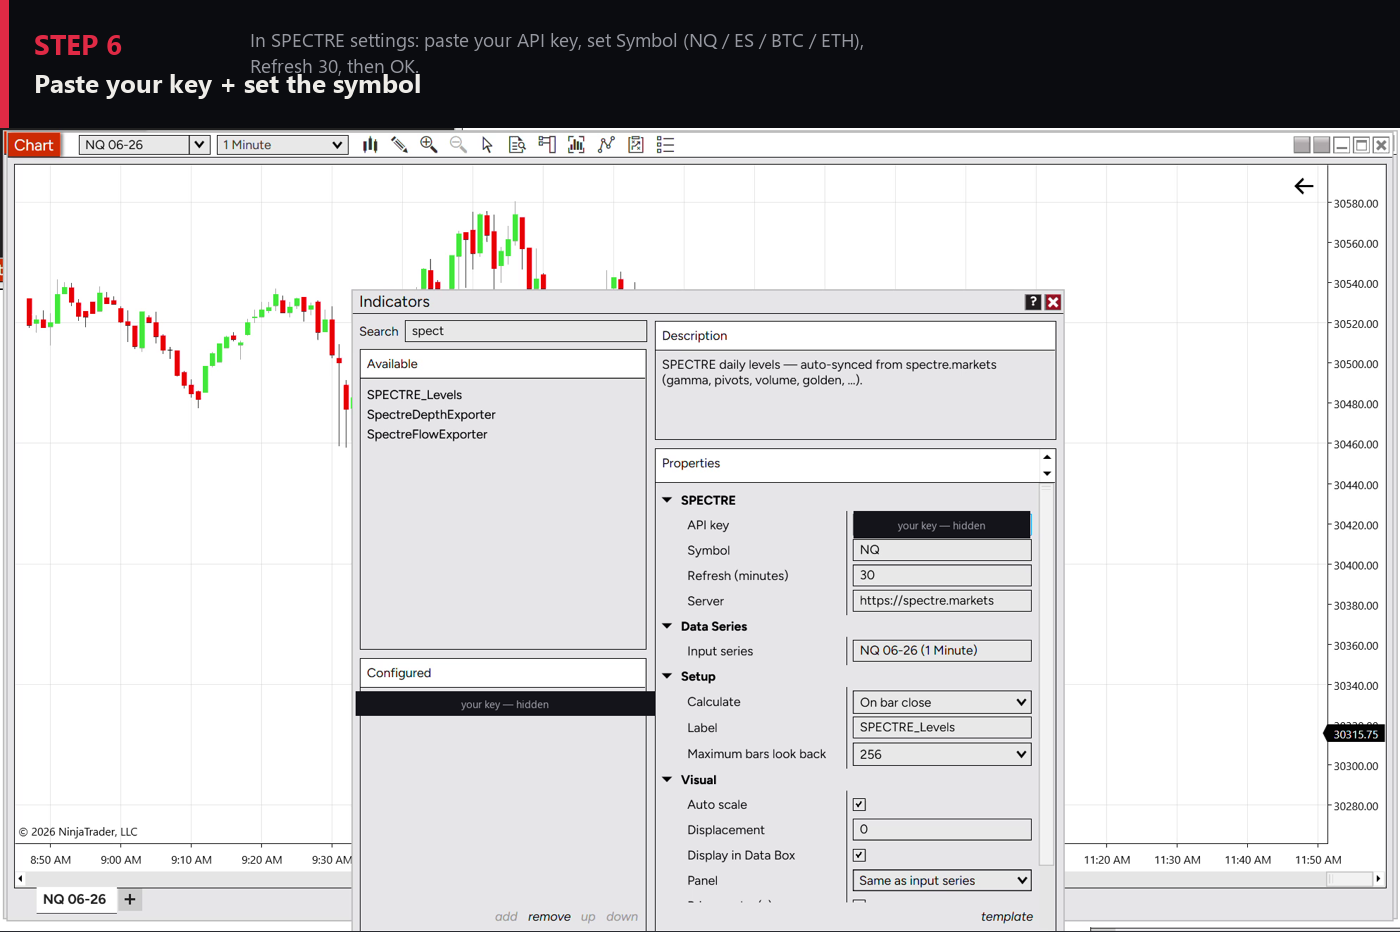
Paste your API key (terminal → ⚡ NinjaTrader auto-sync) and set the Symbol
(NQ / ES / BTC / ETH), then OK.
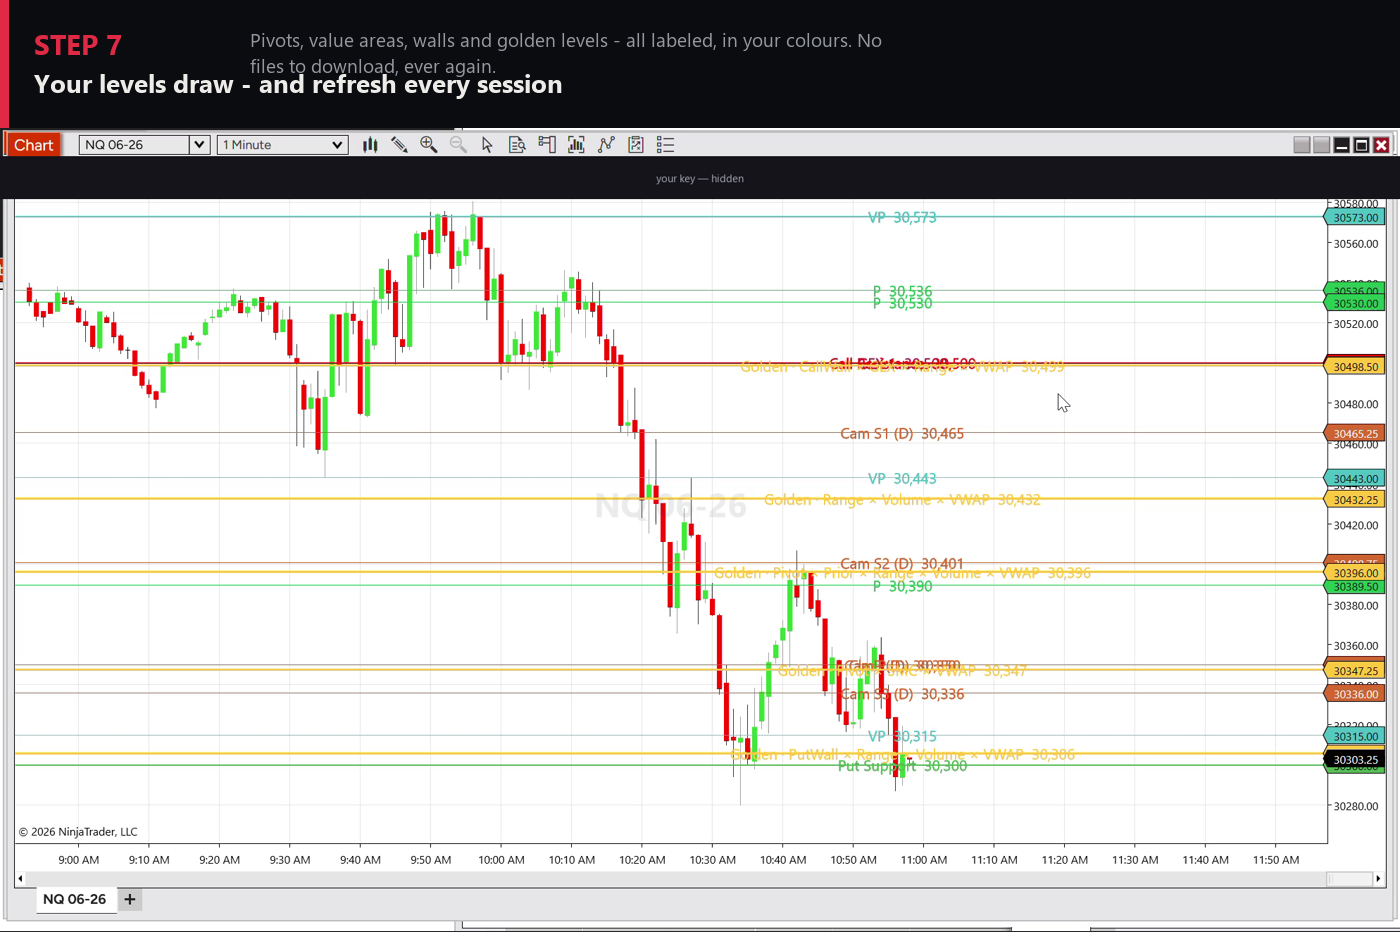
Your levels draw — and refresh themselves every session.
If nothing draws
Re-check the API key is pasted correctly and the chart's Symbol matches one we publish (NQ / ES /
BTC …). Chart files need the Edge plan; on a lower tier the indicator prints an upgrade note. The
indicator needs outbound HTTPS — if your firewall blocks NinjaTrader, allow it.
02 — PlatformDeepChart
Annotations .xml
The annotations .xml
file: SPECTRE_NQ_2026-06-12_deepchart.xml · imports as native annotations
Download the .xml file from the terminal (Files panel → DeepChart).
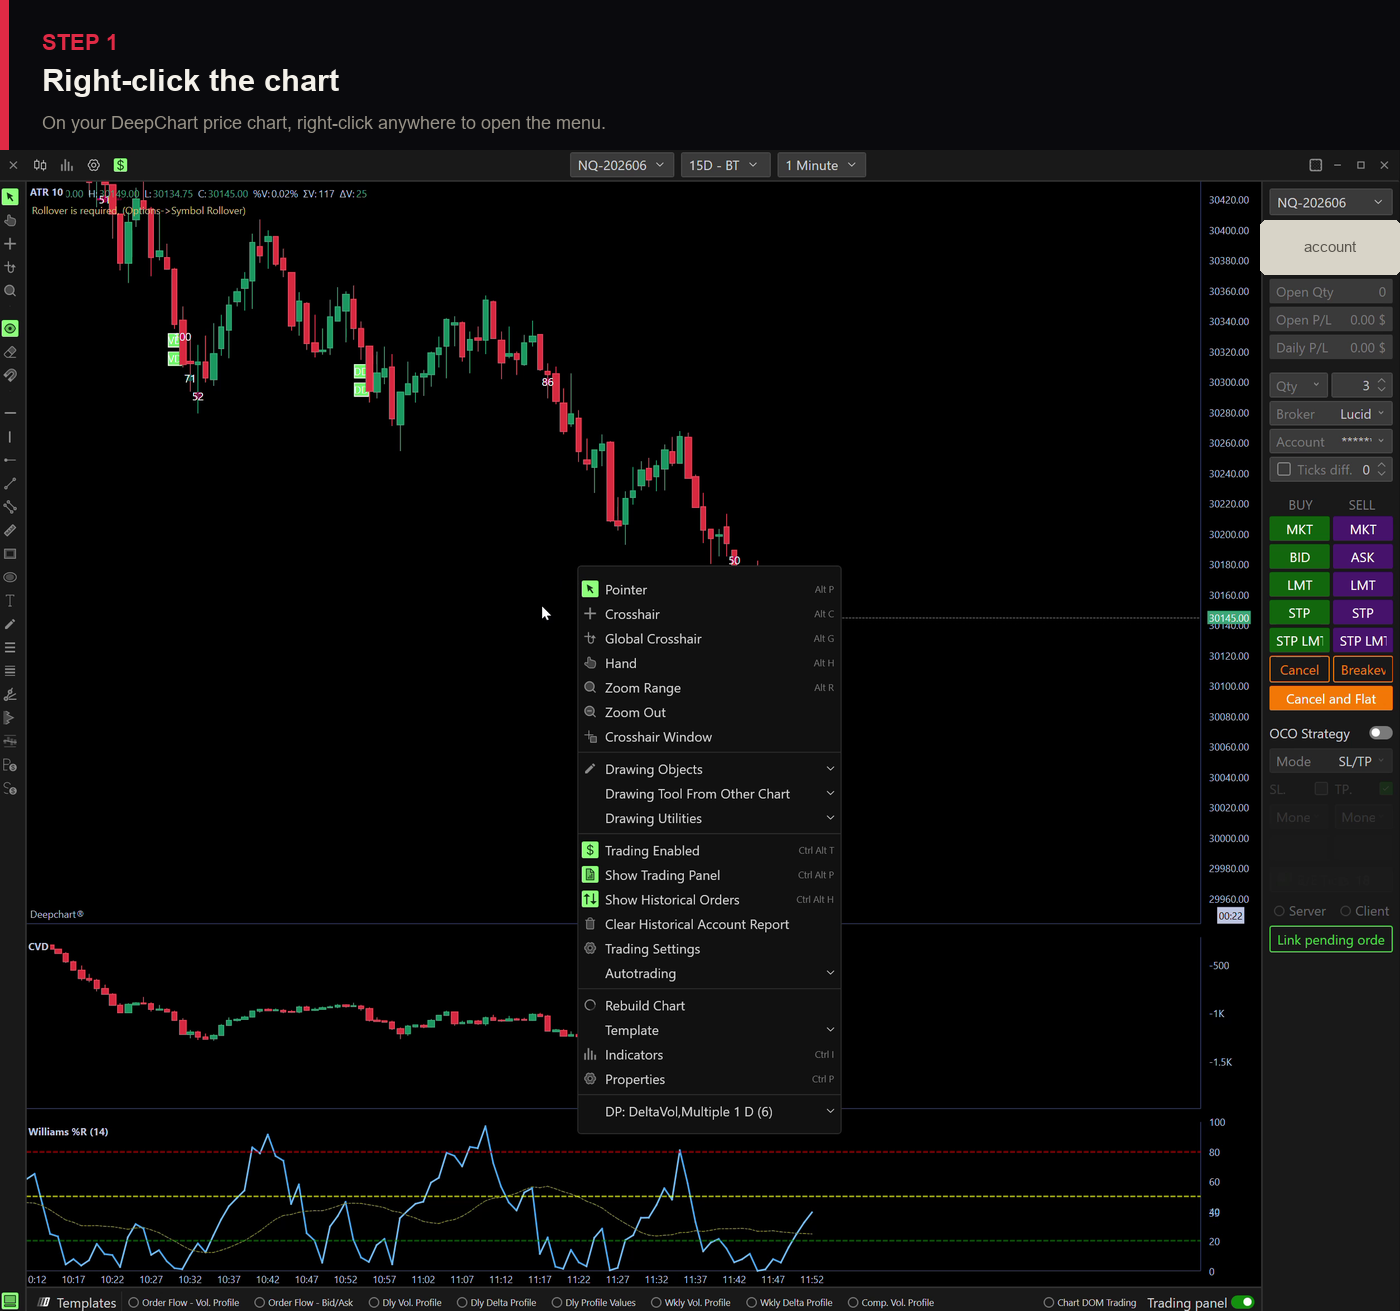
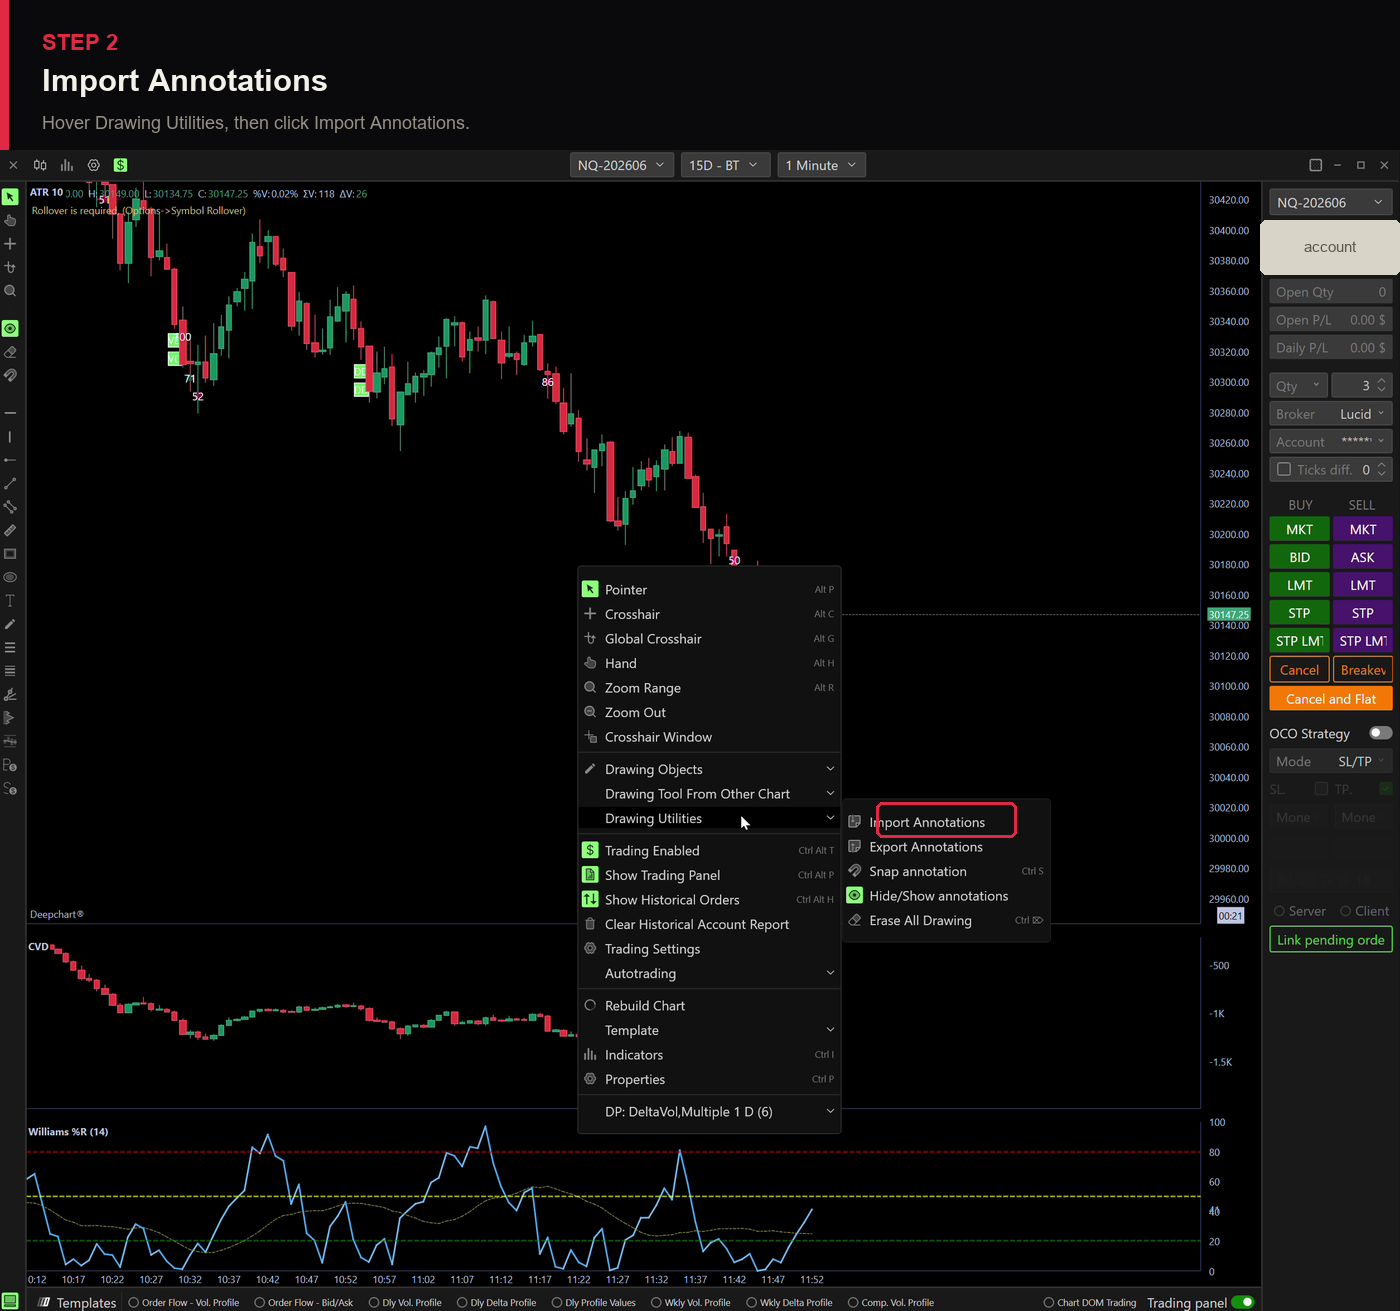
On your DeepChart price chart, right-click anywhere to open the menu.
Go to Drawing Utilities → Import Annotations.
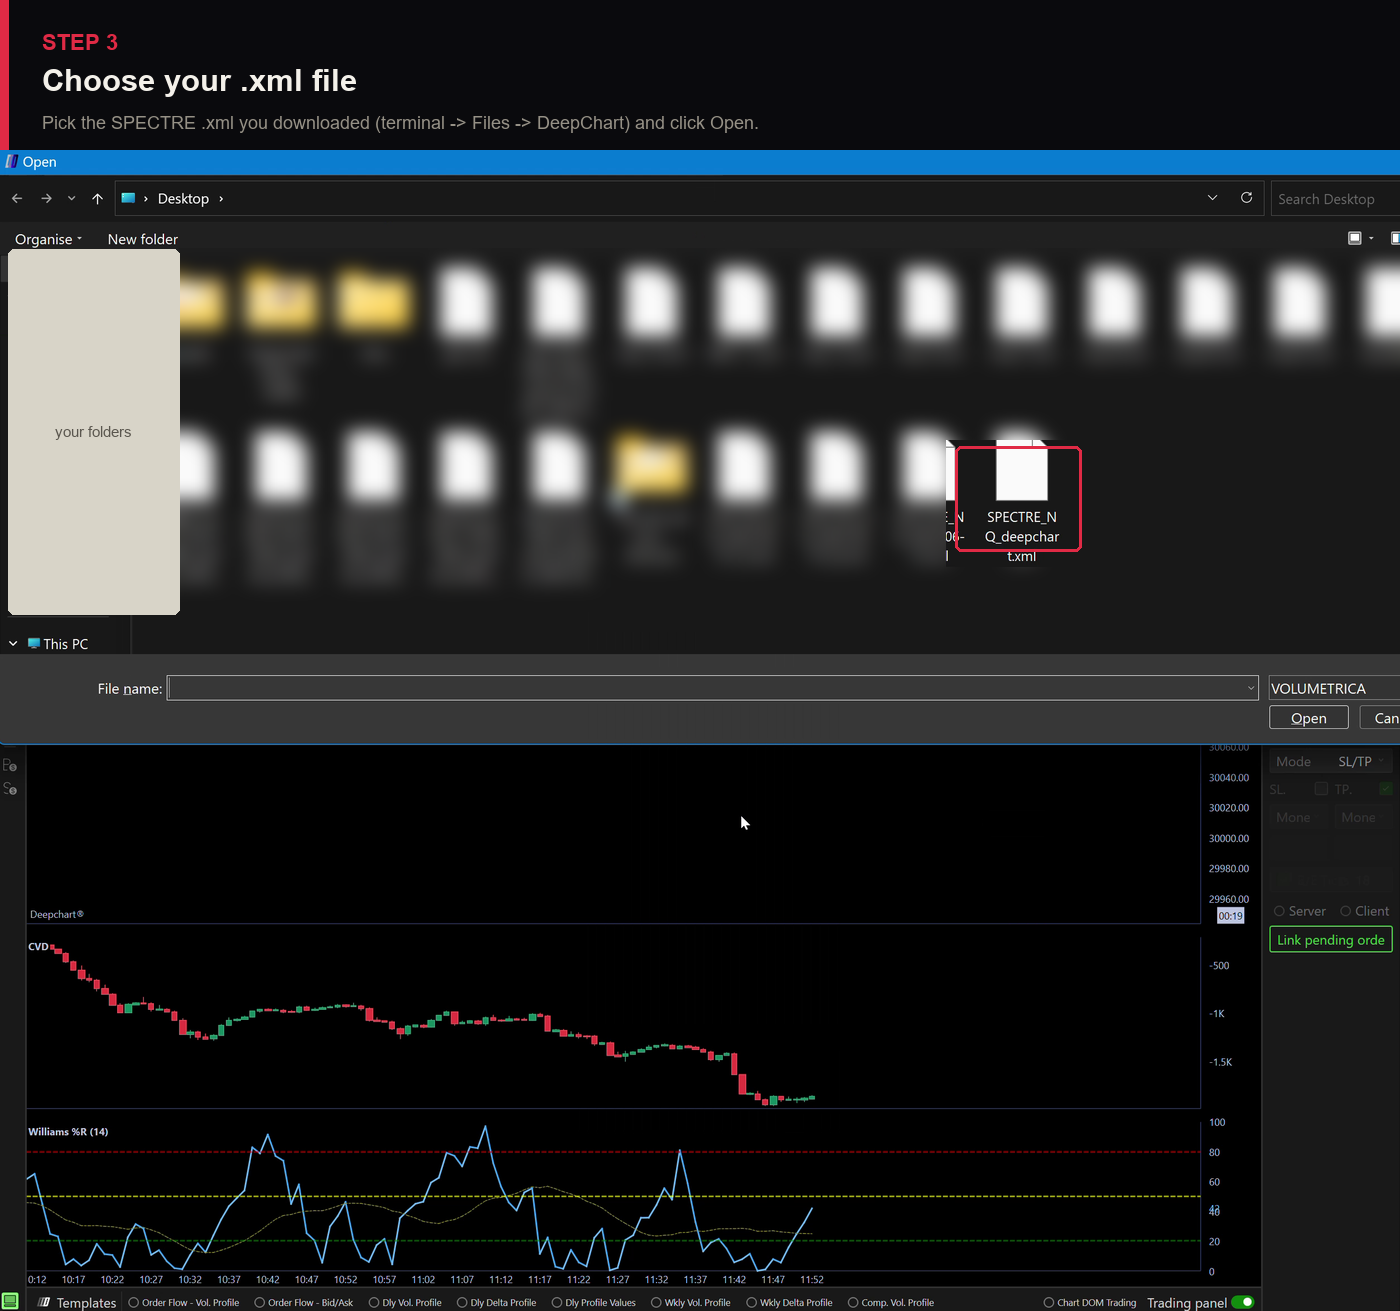
Choose the SPECTRE .xml you just downloaded and click Open.
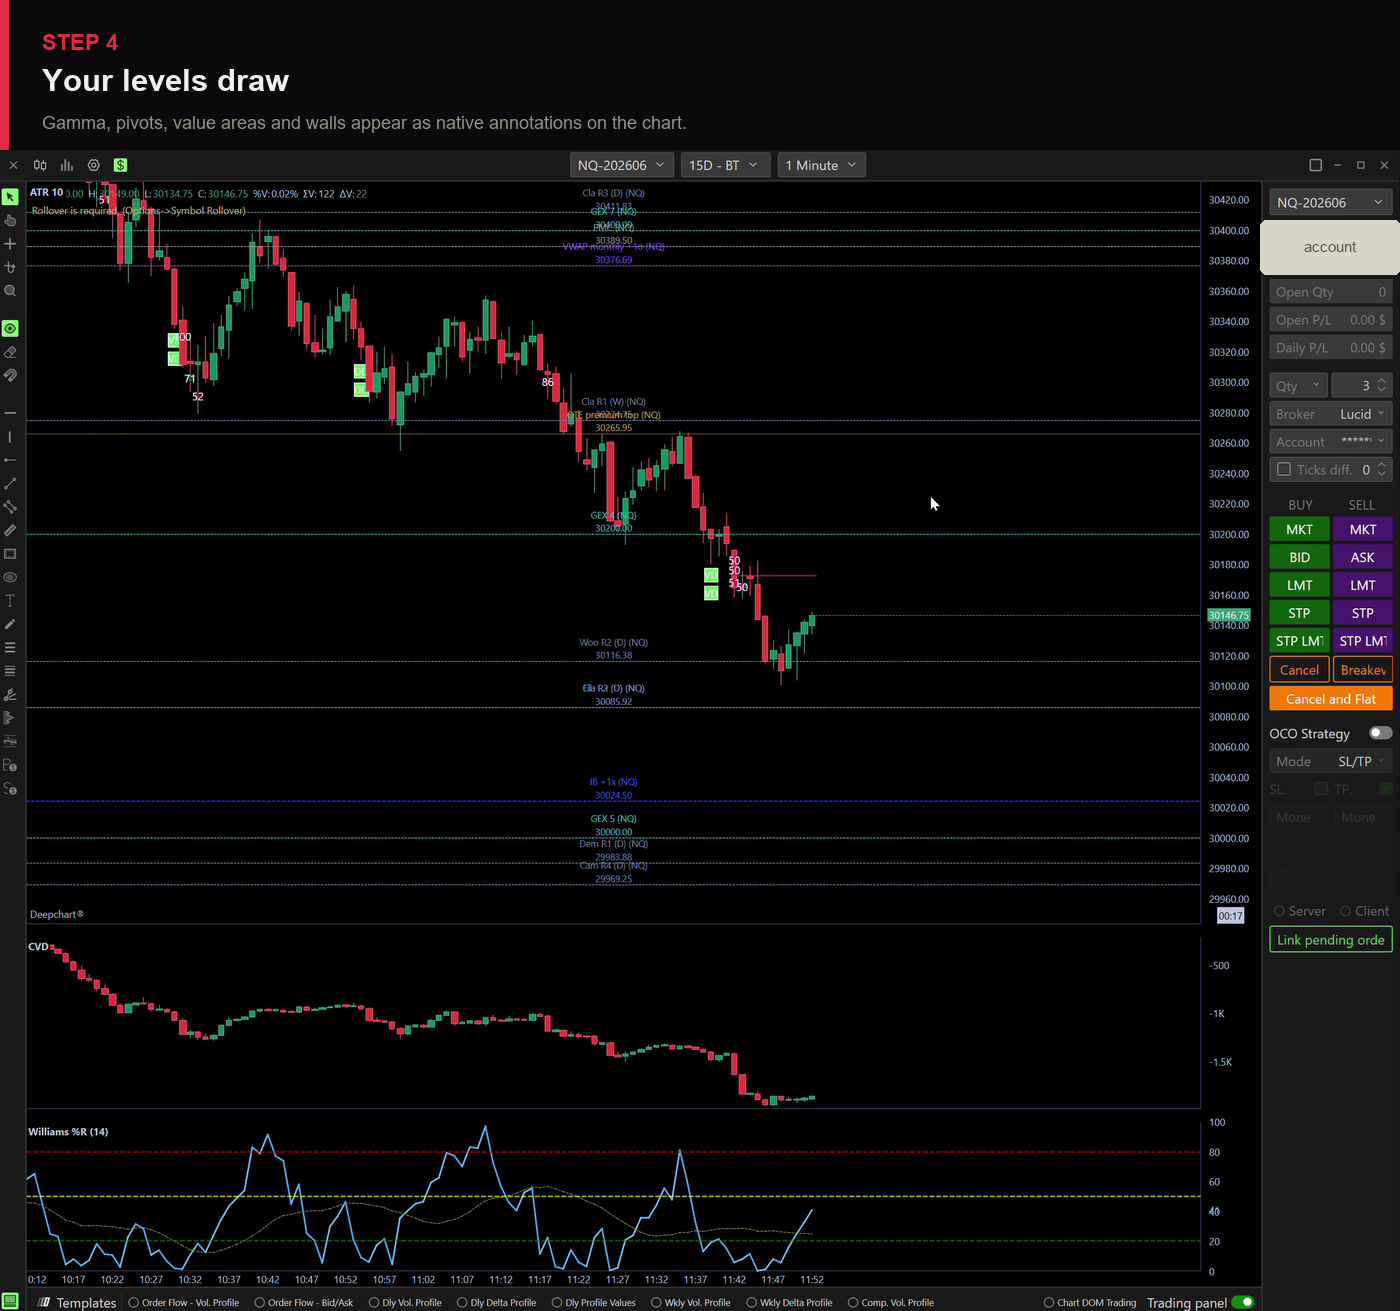
The levels draw as native annotations. Make sure the chart is on the same instrument
(e.g. NQ) the file is for, or they won't line up.
Next session: import the new file. Old annotations are named by date
(SPECTRE20260612_…) so they're easy to select and clear.
03 — THE FILES THEMSELVESWhat you're importing
Each file contains the session's published level set — gamma flip, call/put walls, GEX strikes,
expected-move band, pivots, value areas, VWAP — exactly what the web terminal shows for your plan.
Files are generated fresh from the day's data at download time and never edited after publication;
the same levels are graded in the public track record.
 Auto-sync indicator